This is one of my favourite upcycling projects. I'm sure there are lots of tutorials on t'internet about how to make a bag from a pillowcase. I'm not saying this is the best way, but this is the way I do it!
First you need a pillowcase; they are really easy to pick up in charity shops and I love the chintzy floral prints.
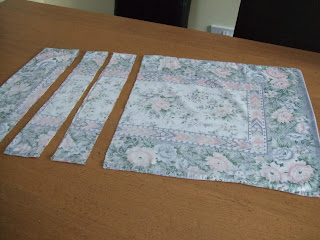
Then you need to chop it into pieces.
The bottom piece is the main part of your bag - I measured this to be 18 inches deep.
The two smaller pieces will be the handles; mine are 3 inches deep.
(The top part is leftover; ideal scrap for applique and patchwork projects.)
Take your two handles and turn the ends under and pin.
I top stitch these together, rather than sewing it inside out then struggling to turn them back again.
 |
| Here they are all stitched, ready to attach onto the bag part. |
Turn the bag part inside out (hopefully you've realised by this point that the beauty of using a pillow case is that it is almost a bag anyway!!) and turn over and iron the top edge down, slipping your handles under in the right place.
Stitch all around near the raw edge. (I cut mine with pinking shears to avoid fraying but you might need to do a double hem here.)
Then turn your bag the right way out and topstitch all around the top, making sure you go over the handles. This will give them extra strength and stop the top of your bag flopping over.
Ta-dah!
(And it folds up all teeny tiny so it's fab for popping in your handbag when out shopping.)


Great bag tutorial, but I wish I could find pre-loved pillowcases as nice as that one!
ReplyDeletexx
I think it would be nice to use two pillowcases and nest them. This way you have a lining for strength. Possibly this is how to use up a plain pillowcase or one you "cannot get stain out" of.
ReplyDeleteYes, you could put a plain one inside as a lining to make a thicker bag. I have also used pillowcases as linings for bags made from other materials.
ReplyDelete